A Pixie Cut for Round Faces
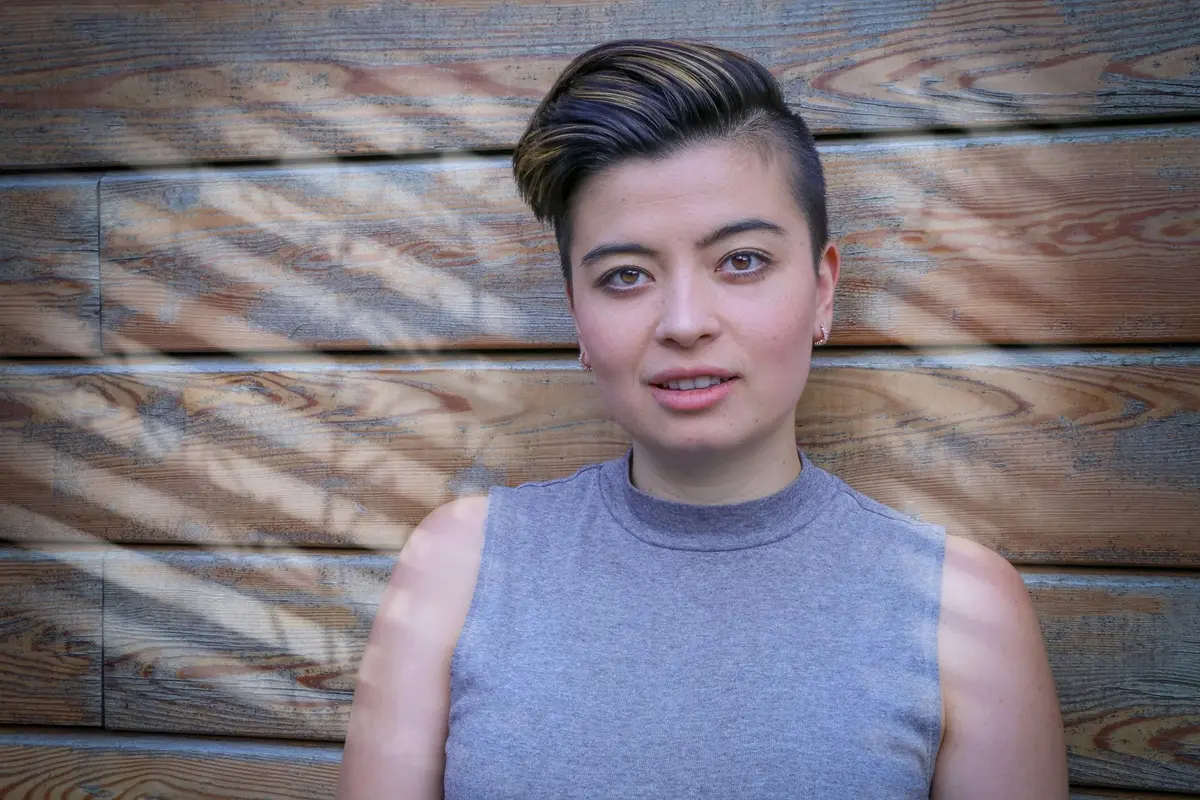
A successful pixie cut for a round face relies on the intentional placement of height and texture. By drawing the eye upward toward the crown rather than emphasizing the width of the cheekbones, you create an elongated silhouette. This aesthetic goal requires precise attention to the distribution of weight.
This guide covers the structural approach to styling short hair that favors geometry over length. Focus your efforts on the apex of the head to establish the desired proportion.
- Difficulty
- Beginner
- Total time
- 45 minutes
- Cost
- Moderate
- Cadence
- Quarterly maintenance
Ingredients
- Silica-based powder: Provides friction to the hair shaft for lasting lift.
Tools List
- Professional-grade hair shears
- Texturizing shears
- Small-diameter round brush
- Matte texturizing powder
Step by step
Section the hair for maximum elevation
Divide your hair into two distinct zones. Isolate the crown area, where you intend to build the bulk of the height. Leave the sides and the nape shorter to minimize peripheral width, which keeps the visual focus on the center of the head.
Tip: Use a fine-tooth comb to ensure clean partings.Create vertical layers at the crown
Use shears to cut the crown hair at an upward angle. Shortening the hair toward the back while keeping the front fringe slightly longer introduces necessary lift. Constant upward tension is required to ensure the layers stack correctly.
Tip: Check length against the bridge of the nose.Remove weight to encourage lift
Use thinning shears or the point-cutting technique to remove weight from the interior of the crown. Removing density prevents the hair from falling flat against the scalp. This creates the architectural foundation for a voluminous style.
Tip: Cut small sections to avoid over-thinning.Apply product for directional support
Work a pea-sized amount of styling pomade into the damp crown area. Use a round brush to direct the hair upward as you dry. The goal is to set the roots at an acute angle to the scalp, reinforcing the height created during the cutting phase.
Tip: Focus heat at the root.Lock the shape with light hold
Apply a final dusting of texturizing powder at the base of the crown. Use your fingertips to lift and separate the ends. Verify that the sides remain sleek to maintain the contrast between the narrow perimeter and the elevated top.
Tip: Less product is more effective.
Trouble
Why is the top falling flat?
You may have left too much weight in the crown layers. Return to the texturizing step and point-cut the interior of the hair to remove density.
The sides look too wide, how do I fix this?
The sides must be kept shorter than the top. Trim the perimeter tighter to the head to maintain the contrast that defines the pixie silhouette.
Can I use a heavy cream product?
Avoid heavy creams, as they weigh down the hair. Use lightweight pomades or texturizing powders to maintain lift and structural integrity.
How often should I trim?
A pixie cut loses its shape quickly. Schedule a trim every four to six weeks to keep the layering sharp and the volume vertical.
Height at the crown is the most effective tool for balancing a round facial structure.
The structure of the cut is the priority here; product is merely the support system.