How to hang something heavy without asking anyone for help
The wall is not going to win. Sam walks you through six steps from stud-finder to victory mirror — 45 minutes if you do it right, $8–15 in materials, no second person required.
The wall is not going to win. Stud finder, the right anchor, a level, a pre-drilled pilot hole, and the discipline to step back before you decide it's crooked. Six steps, 45 minutes, no second person required.
- Time: ~45 min + patching, if
- Cost: $8–$15
- Skill: Stubbornly doable
- Mess factor: ●○○ Dust
- Updated: Spring '26
You've been moving that mirror from room to room for three weeks because you can't decide where it goes. You've decided. It goes there. On that wall. Today.
And you're not asking anyone to help you do it. You don't need a second person. You need a stud finder, the right anchor, a level, and the discipline to step back before you decide it's crooked. The whole project takes forty-five minutes if you do it right and two hours if you have to patch a hole — and we're going to do it right.
Drywall alone won't hold a screw under any real load. The wall is gypsum and paper. The studs are wood. Find the wood, or use a real anchor.
That sentence is the whole article. The rest is just how to find the wood, what counts as a real anchor, and why you should buy a four-dollar level instead of trusting your eyes.
§ 01 / Tools
What you actually need
Total budget: $8–$15 in materials. Most of the cost is the level — and the level is the thing you'll use on every project for the rest of your life. Buy the four-dollar level.
- Stud finder (or your knuckle) — $8–15 for the cheapest. Or use the knuckle test for free. (×1)
- Drill (cordless, any size) — Borrow if you don't own one. Don't buy a $300 one for hanging a mirror. (×1)
- Bubble level (24" or longer) — $4 at any hardware store. Best four bucks you'll spend on this project. (×1)
- Toggle bolts OR threaded drywall anchors — Rated for double the weight you're hanging. Read the label. (×2–4)
- One good screw, length matched to your anchor — Comes with the anchor packet usually. (×1)
- Pencil — For marking studs and the spot. Not a Sharpie. Pencil. (×1)
- Coffee — Non-negotiable. (×1 mug)
The six steps
06 STEPS · ≈45 MIN ACTIVE
Step 01 · Find · 5 min
Find the stud first. Always.
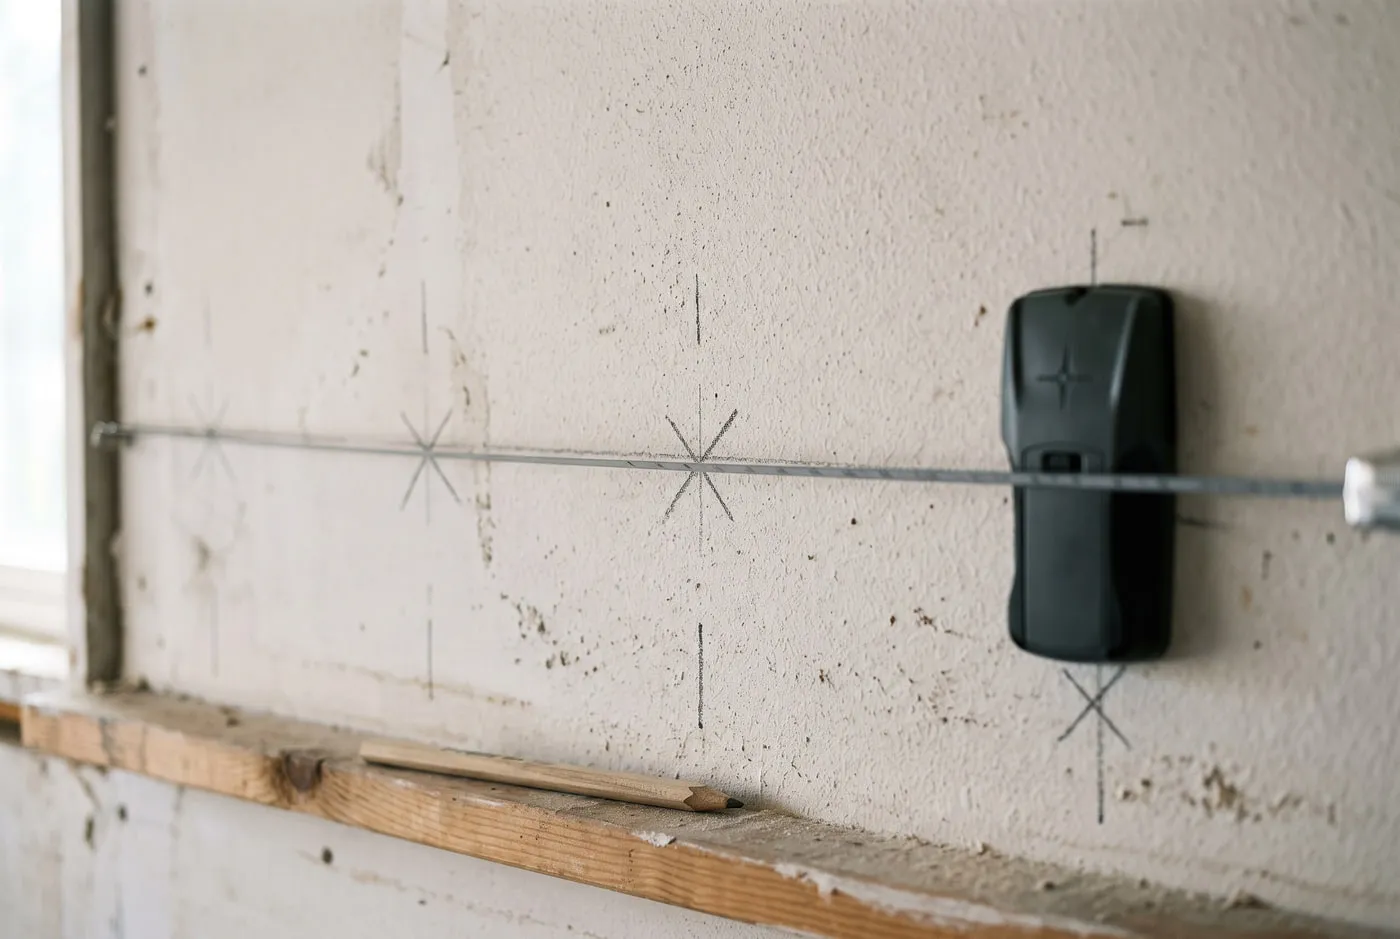
Knock along the wall with your knuckle until the sound changes from hollow to solid. That's the stud. That's your best friend right now. A stud finder works too — but honestly your knuckle is free and already attached to you.
Studs are typically sixteen inches apart on center. Once you find one, you can usually find the next without checking. Mark each one in pencil so you don't lose track when you start drilling.
Step 02 · Anchor · 5 min
If there's no stud where you need it, use the right anchor.
Not all wall anchors are the same. The little plastic ones that come in the box with the thing you bought are usually garbage. Get a toggle bolt or a threaded drywall anchor rated for more weight than whatever you're hanging.
Double it. Trust nothing. The label on the anchor tells you the rated load — read it before you buy. A heavy mirror weighs more than you think. A mirror plus a kid pulling on it weighs more still.
Step 03 · Level · 1 min
Use a level.
I know you think you can eyeball it. You cannot. Nobody can. Use the level. Spend the extra forty seconds. You will stare at that thing every single day and you will know if it's a half-degree off.
The level is four bucks at any hardware store. It is the single best four dollars you can spend on this project. If you don't own one yet, buy one before you do anything else on this article.
Step 04 · Drill · 2 min
Pre-drill the pilot hole.
Don't force the screw straight into drywall. Pre-drill a pilot hole slightly smaller than your screw. It goes in cleaner. It holds better. The wall respects it more.
If you're using an anchor, the anchor box tells you what drill bit to use — match it exactly. If you're going into a stud, a 1/16-inch pilot hole is plenty.

Step 05 · Hang · 5 min
Hang it. Step back. Don't touch it.
Hang the thing. Step back. Look at it for ten seconds before you decide it's crooked.
It is probably not crooked. You are just not used to it being there yet. If it's still bothering you after ten seconds and a level confirms a tilt, then adjust. If you adjusted because it "felt" off and the level says it's fine, you've made it actually crooked. Trust the level over your eyes.

Step 06 · Done
The victory moment.
It's up. It's level. Nothing fell. You did not ask anyone for help and you didn't need to.
That's the whole thing. Take a photo. Send it to whoever doubted you. Move on with your life. There is something specifically satisfying about hanging a heavy thing alone — bigger than the project, smaller than a religious experience. Sit with it for a second.

Sam's hot takes
Things I'm tired of seeing
Trusting the plastic anchor in the box
They came free with the thing you bought. They are free for a reason. Toggle bolts are two dollars. The mirror is more than two dollars. Math.
Hanging without finding the stud first
Even if you end up using an anchor, knowing where the studs are tells you where the not-studs are. Drilling into a pipe because you skipped the stud check is a thousand-dollar mistake.
"I'll just use a nail"
For a postcard, fine. For anything that breaks if it falls, no. Nails pull straight out under load. Screws thread. Threading is the whole point.
Asking someone to "hold this for a sec"
They can't read a level from your angle. They get tired in eight seconds. They want to be doing literally anything else. Hang it yourself. That's what this article is about.
What I'd do differently next time
The first heavy thing I hung alone, I used the plastic anchors that came in the box. Within a month the mirror was tilting. Within two months it was on the floor. The plastic anchors that came in the box are decorative. They are not load-bearing. Use a real anchor.
What I'd tell past me: buy a longer level than you think you need. The 24-inch level is the minimum. The 48-inch is better. You'll use it on every shelf, every gallery wall, every curtain rod for the rest of your life. The longer the level, the more accurate the read.
And I'd put the photo step in front of the adjust step. Once you've adjusted by hand twice, your eyes lie to you. The photo doesn't lie. Trust the photo.
If the heavy thing is a shelf rather than a mirror, floating shelves follow the same stud-first rule with longer screws. If it is going on a garage wall, check the framing before you buy anchors: the garage storage piece explains the magnet test for steel studs, where a screw feels tight and holds almost nothing. And if the mirror is the centre of a group of frames, a single reference line keeps the whole arrangement straight.
That's it. Hang the thing.
If you finished — or you're stuck halfway through holding a drill and second-guessing — send a photo. I read everything that comes in. Triumph photos preferred. Failure photos also welcome.
— Sam